This iOS app has been developed to assist our own research group and others in collecting standardized metadata for water isotope samples. It takes advantage of structured data interfaces and the sensors embedded in our now-ubiquitous pocket computers to make metadata collection easier and more robust.
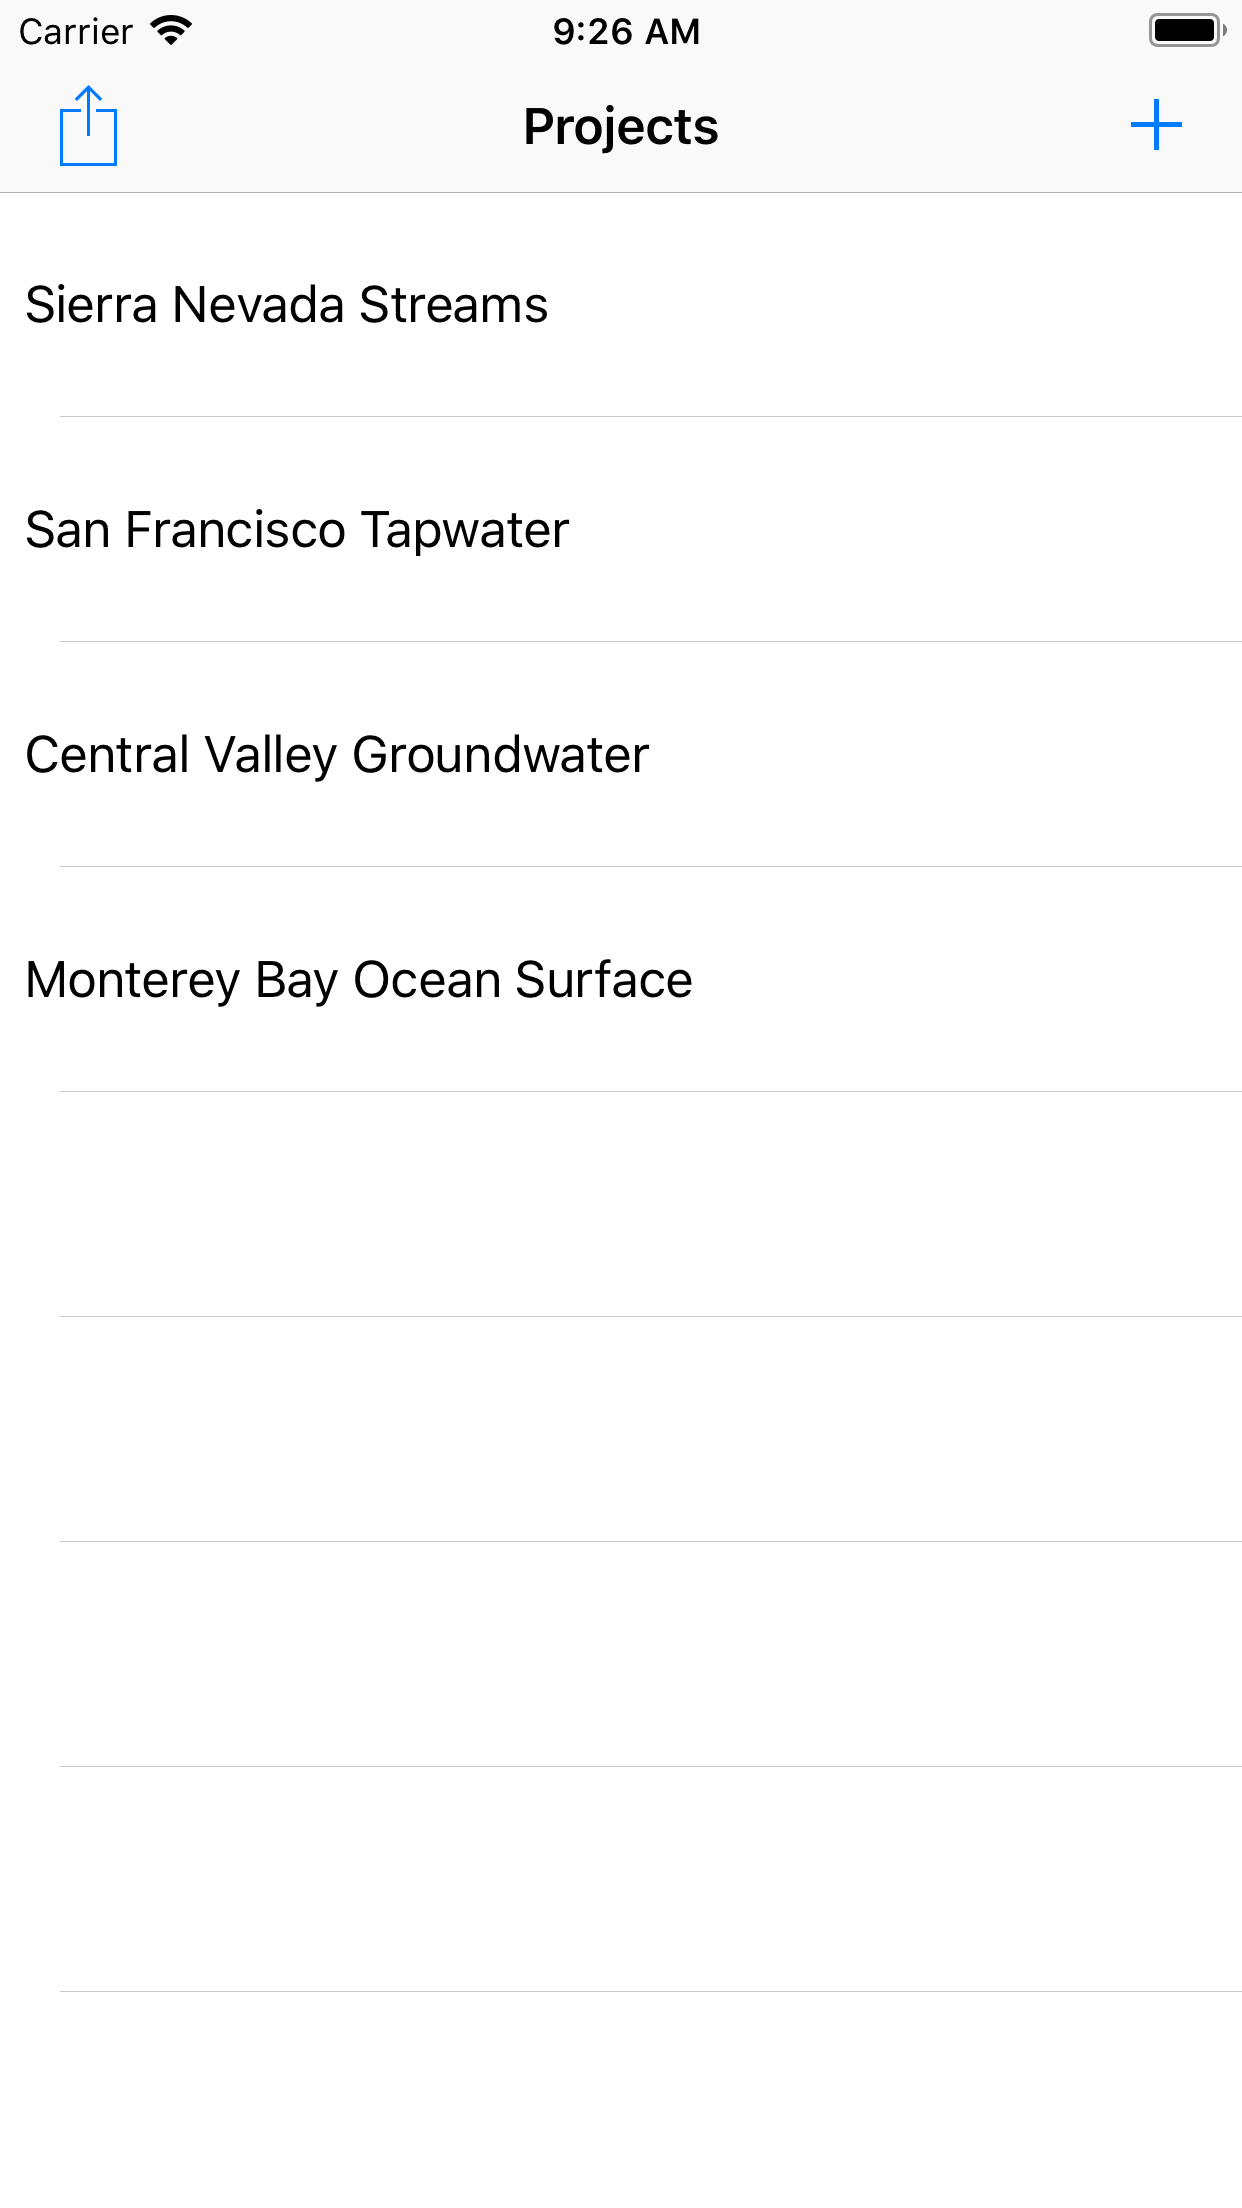
Project ListwiSamples groups Samples within Projects. A Project is intended to be a group of related samples, owned by a particular individual or group and perhaps collected for a common purpose. The home screen that loads on app start is a list of all projects on your device. Initially this list will be empty. Tap the + button to set up your first project. Once you have one or more projects saved on your device, tap a Project Name on this screen to start entering samples. The Share button in the upper left is used to access input/output functionality, including the Pack for Offline feature and project Export. |
|
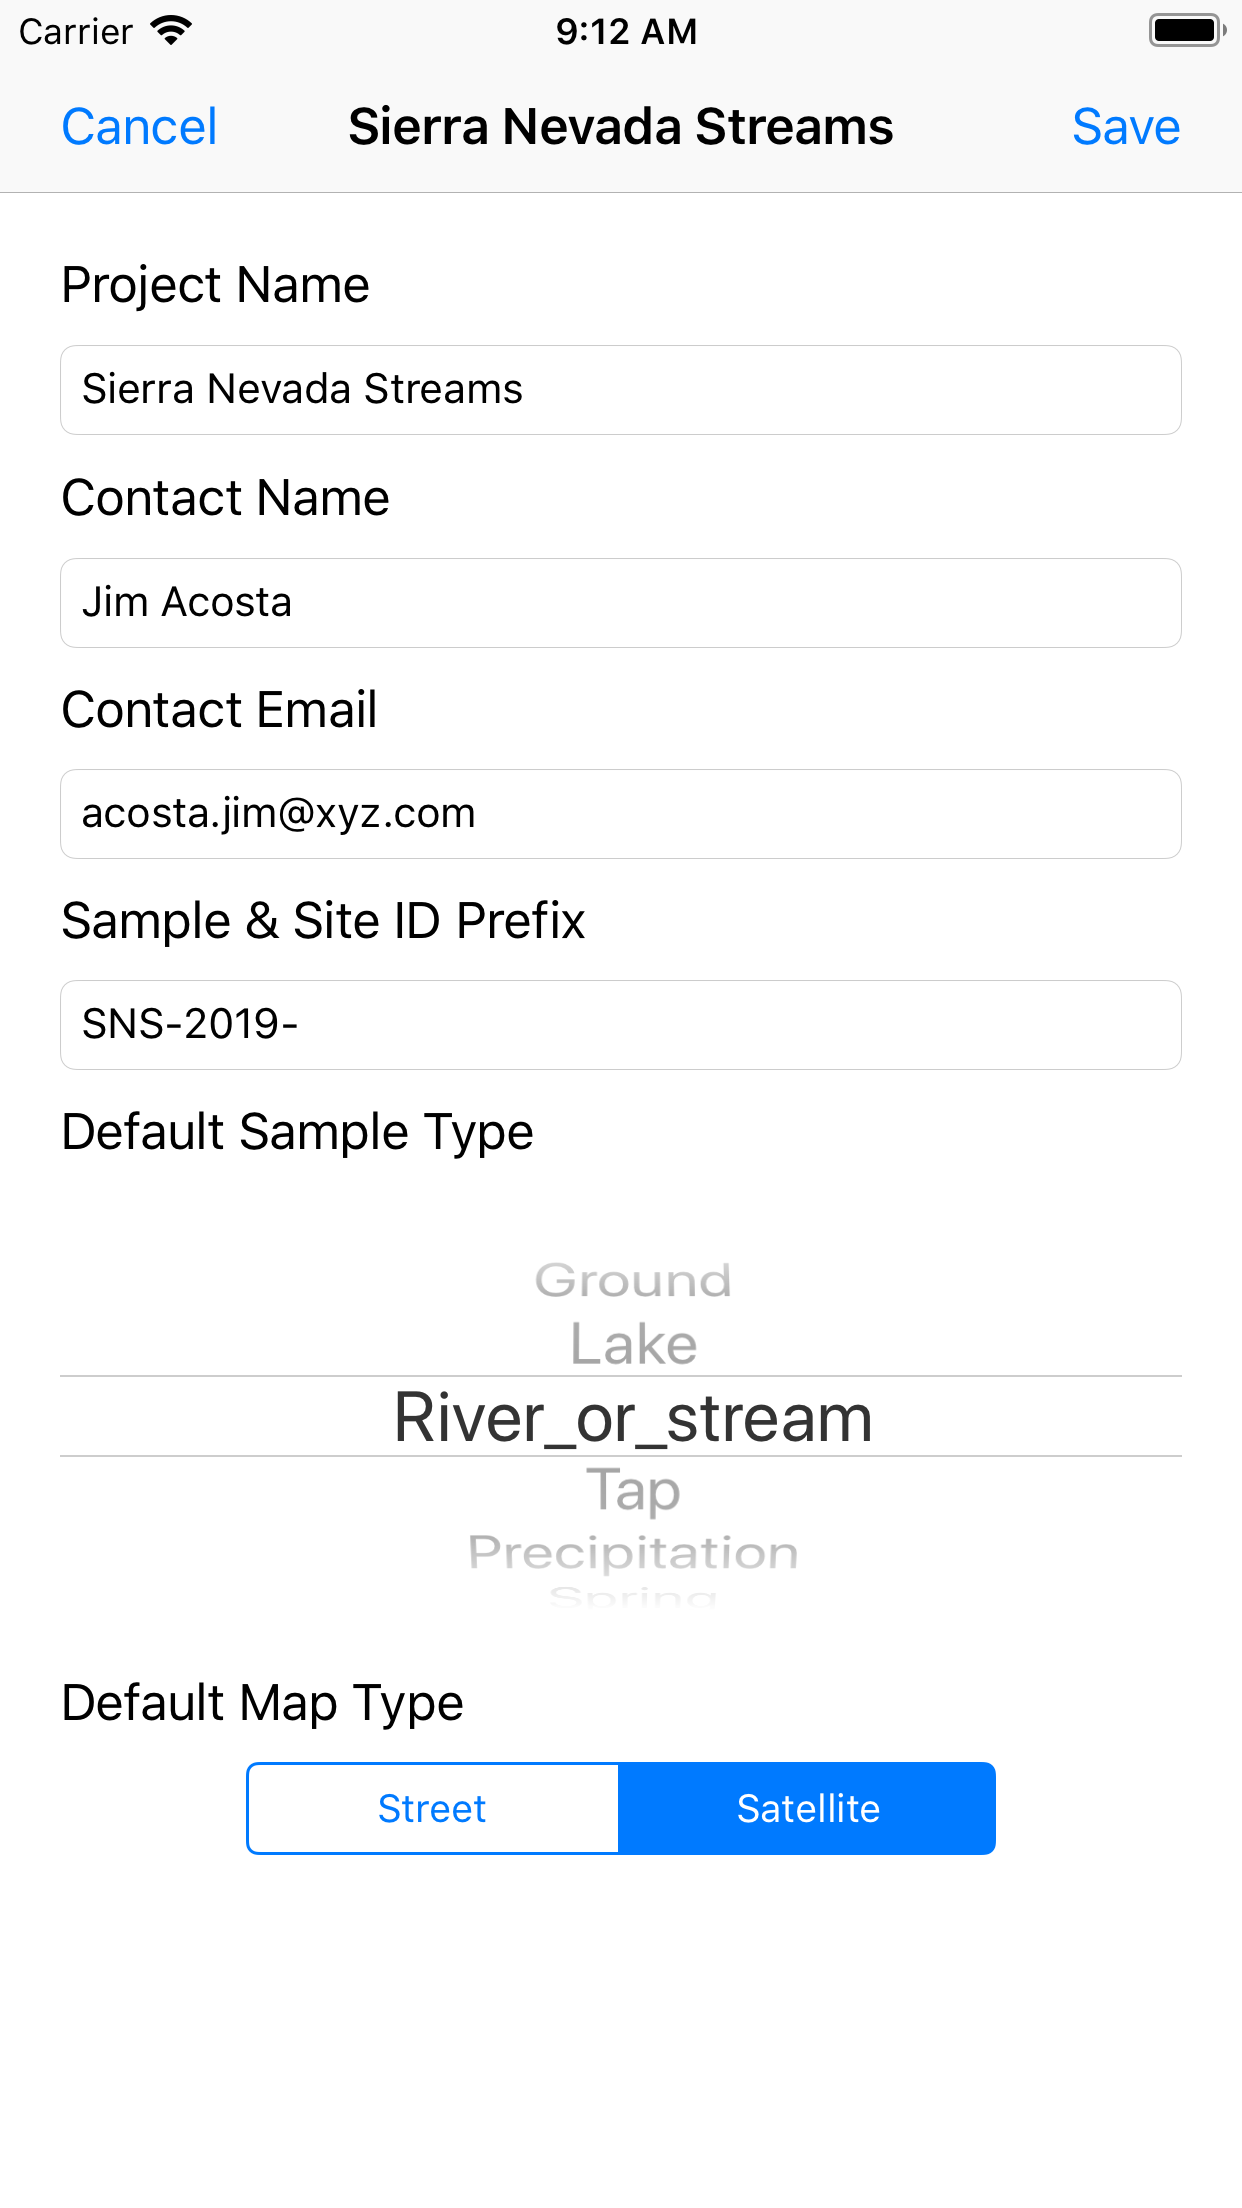
New ProjectThe New Project interface lets you add a new sampling project to your device. In addition to entering ownership and contact information for the project, you can input an (optional) Prefix to be used for auto-generated sample and site IDs. To make sample entry more efficient, choose the most common Sample Type for this project from the selector and the Map Type you'd like to load when setting the sampling location. Tips |
|
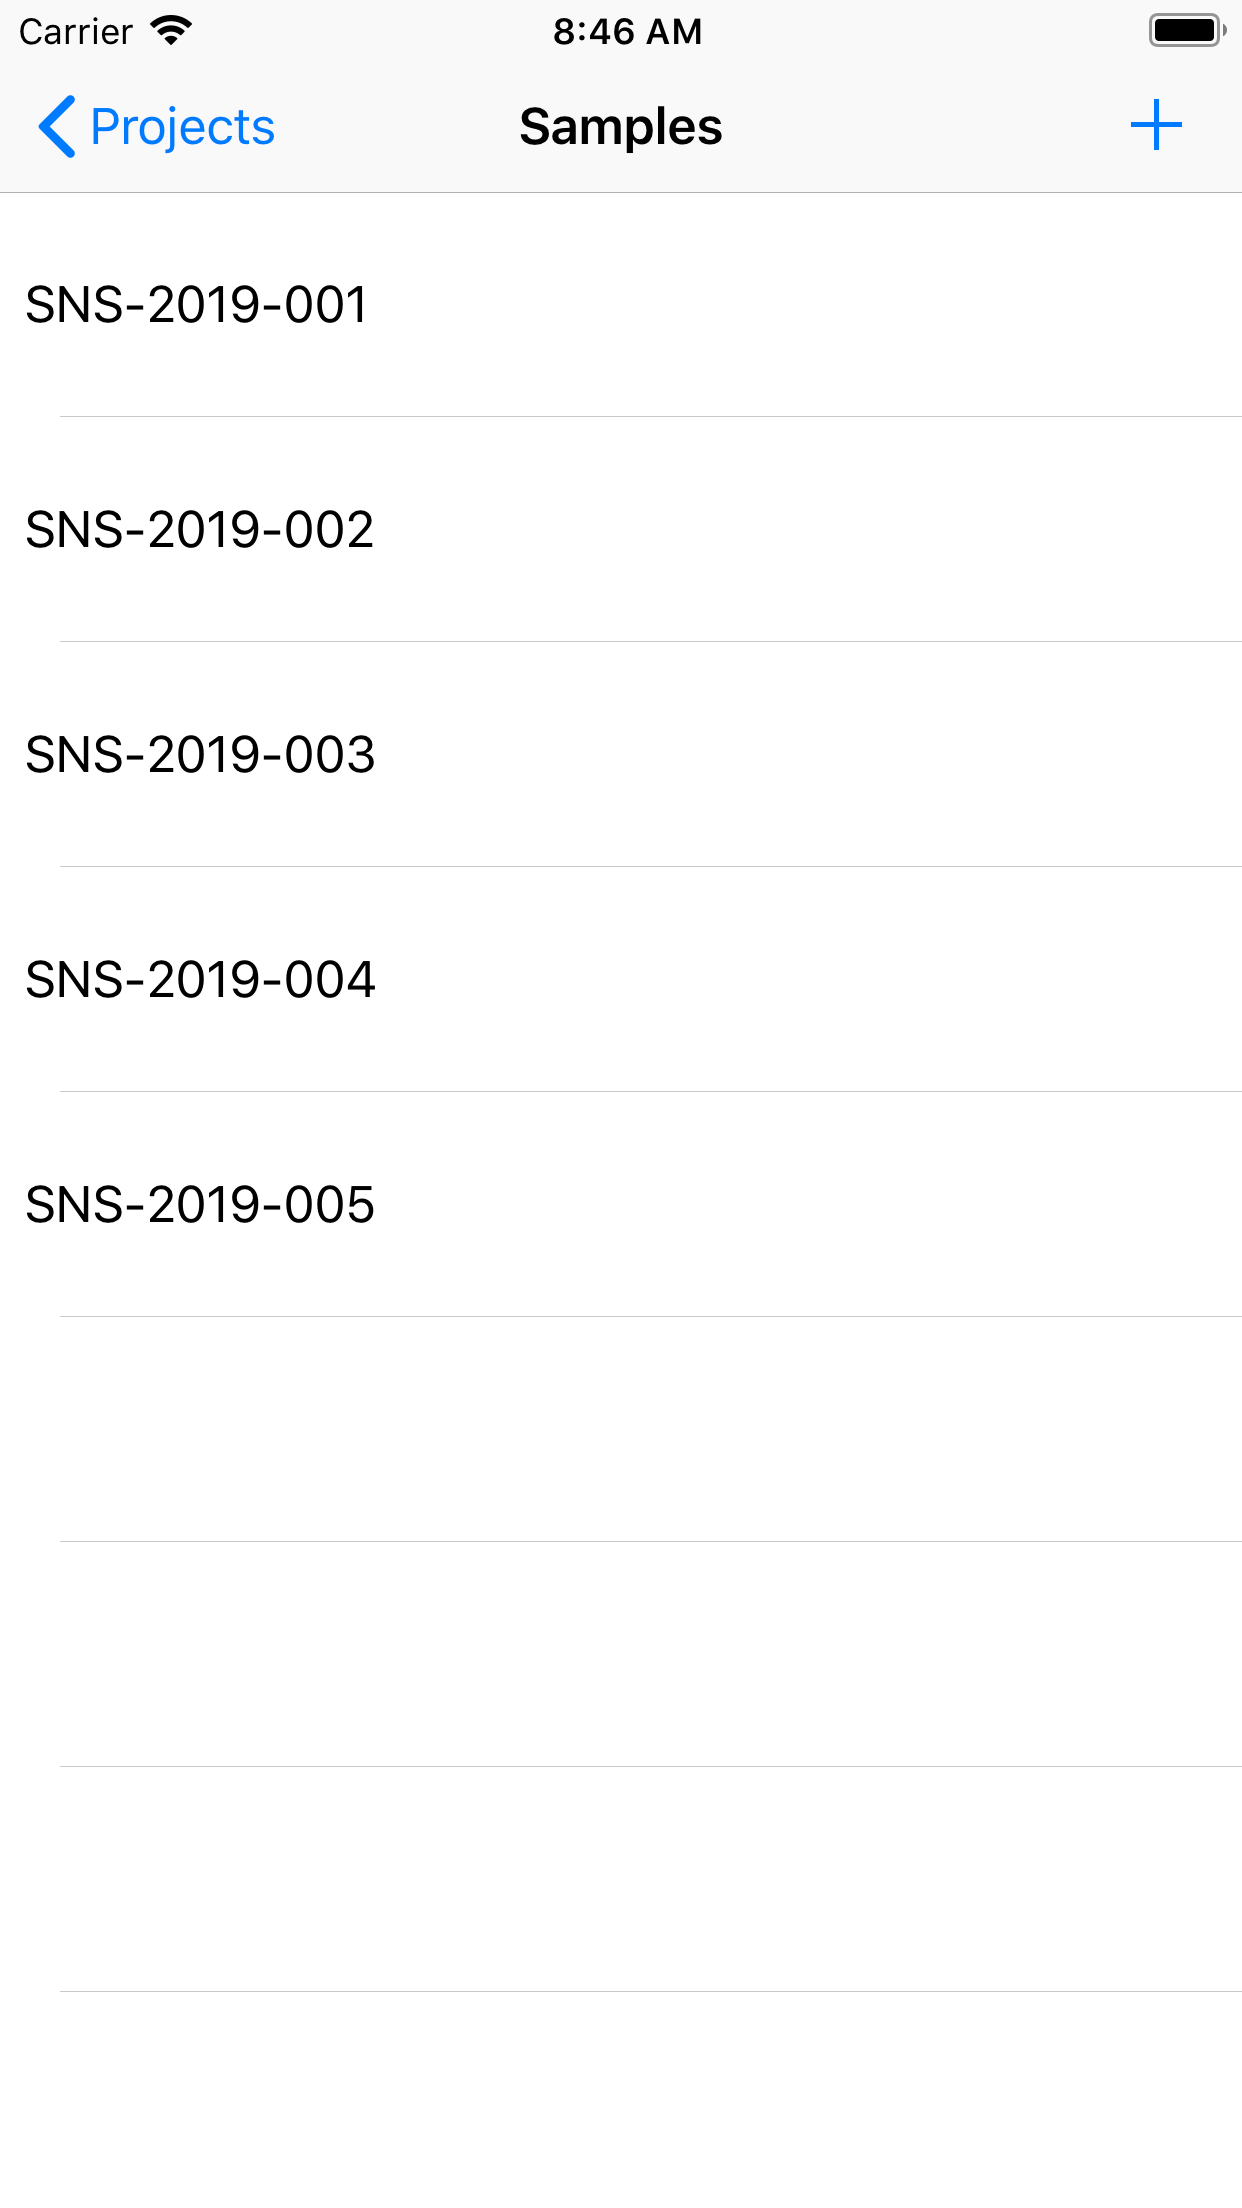
Sample ListA wiSamples project includes a list of samples and their associated metadata. When you access the Sample List screen for a new project you won't see any entries. Use the + button in the upper right to add a sample. Tips |
|
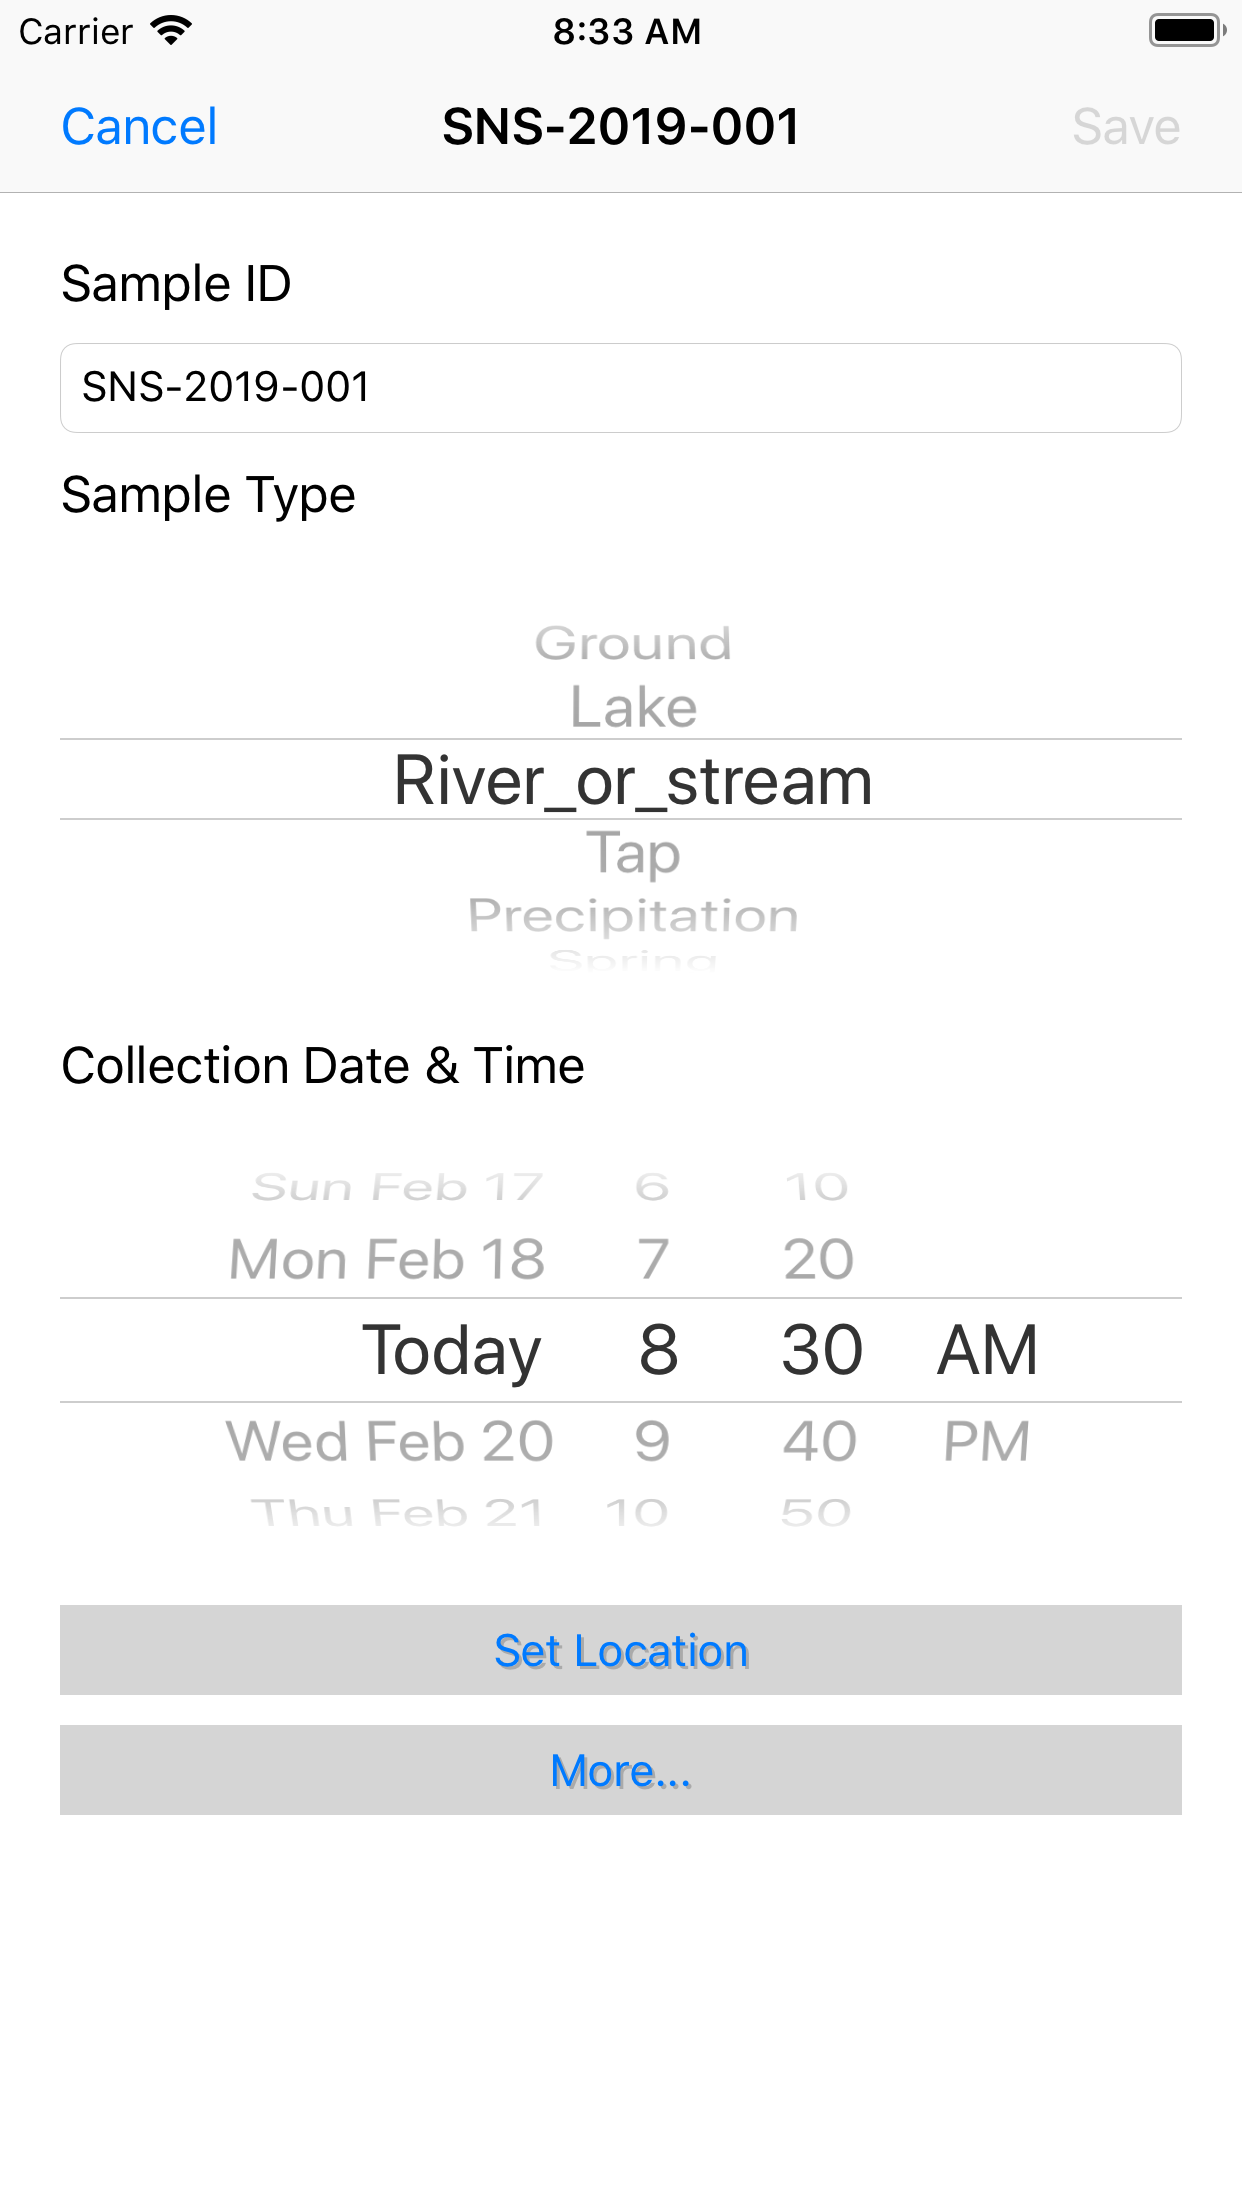
Sample InformationThis is where you start recording information associated with your new sample. Most of the required pieces of information appear on this screen. A suggested Sample ID is auto-generated based on your project's prefix. The format uses an auto-incremented three-digit numeric postfix to ensure that each ID in the project is unique. You can also select this field and enter your own ID, if desired. Type and Collection Date & Time are auto-filled based on the project default and current clock time; they can be changed using the selectors. The app also records the local time zone in the background. Location is required and can be set by tapping the grey button. The More button can be used to add optional metadata elements. Tips |
|
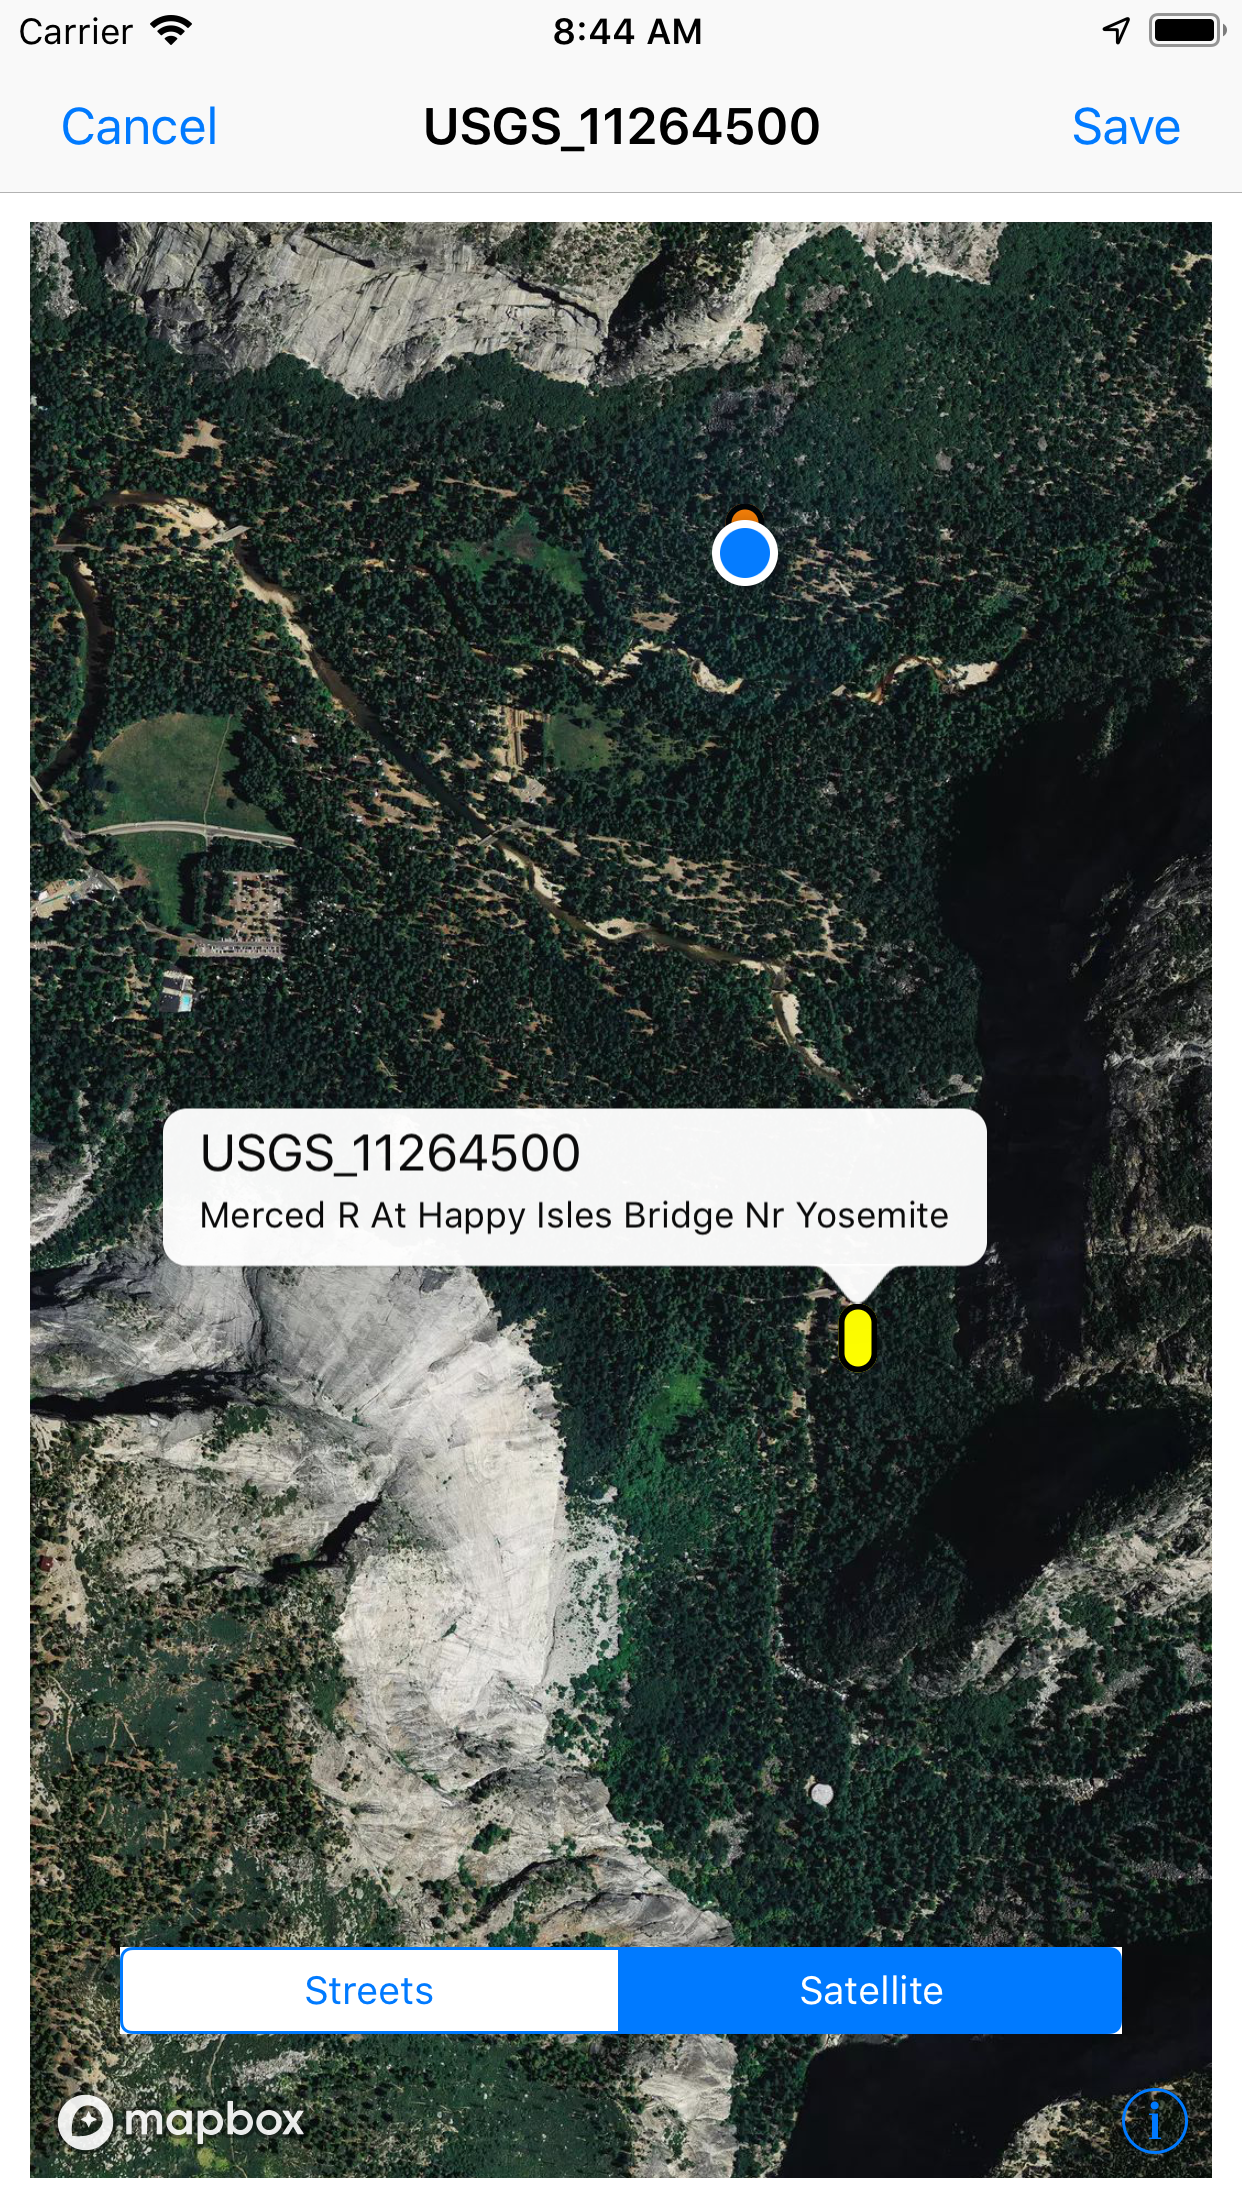
Set Location - Existing SiteThe next step is to record geographic information for your sample. This is done using a map interface. When the map opens, it will zoom to your current location (if you have enabled location services and a good GPS fix is available) to make it easy to select your sampling location while you are on-site. You have three options for defining a site location. If you are collecting a new sample at a geographic location that has already been sampled, the best option is to associate your sample with the existing site information. This limits the amount of duplication in the metadata records because each unique geographic location is recorded only once. It also makes it easier to match up samples that were collected at the same location, for example to compare different water types at that location or analyze a time series of sample values. The wiSamples App displays existing sites on the map interface as orange ovals. Two types of site are shown. Any sites that have already been recorded on the user's device are shown. In addition, if the device has data connectivity or the local area has been "packed" for offline use water isotope sampling sites from the wiDB will be displayed. To associate your sample with either type of existing site just tap the site icon, which will turn yellow when selected, and then the Save button. Tips |
 |
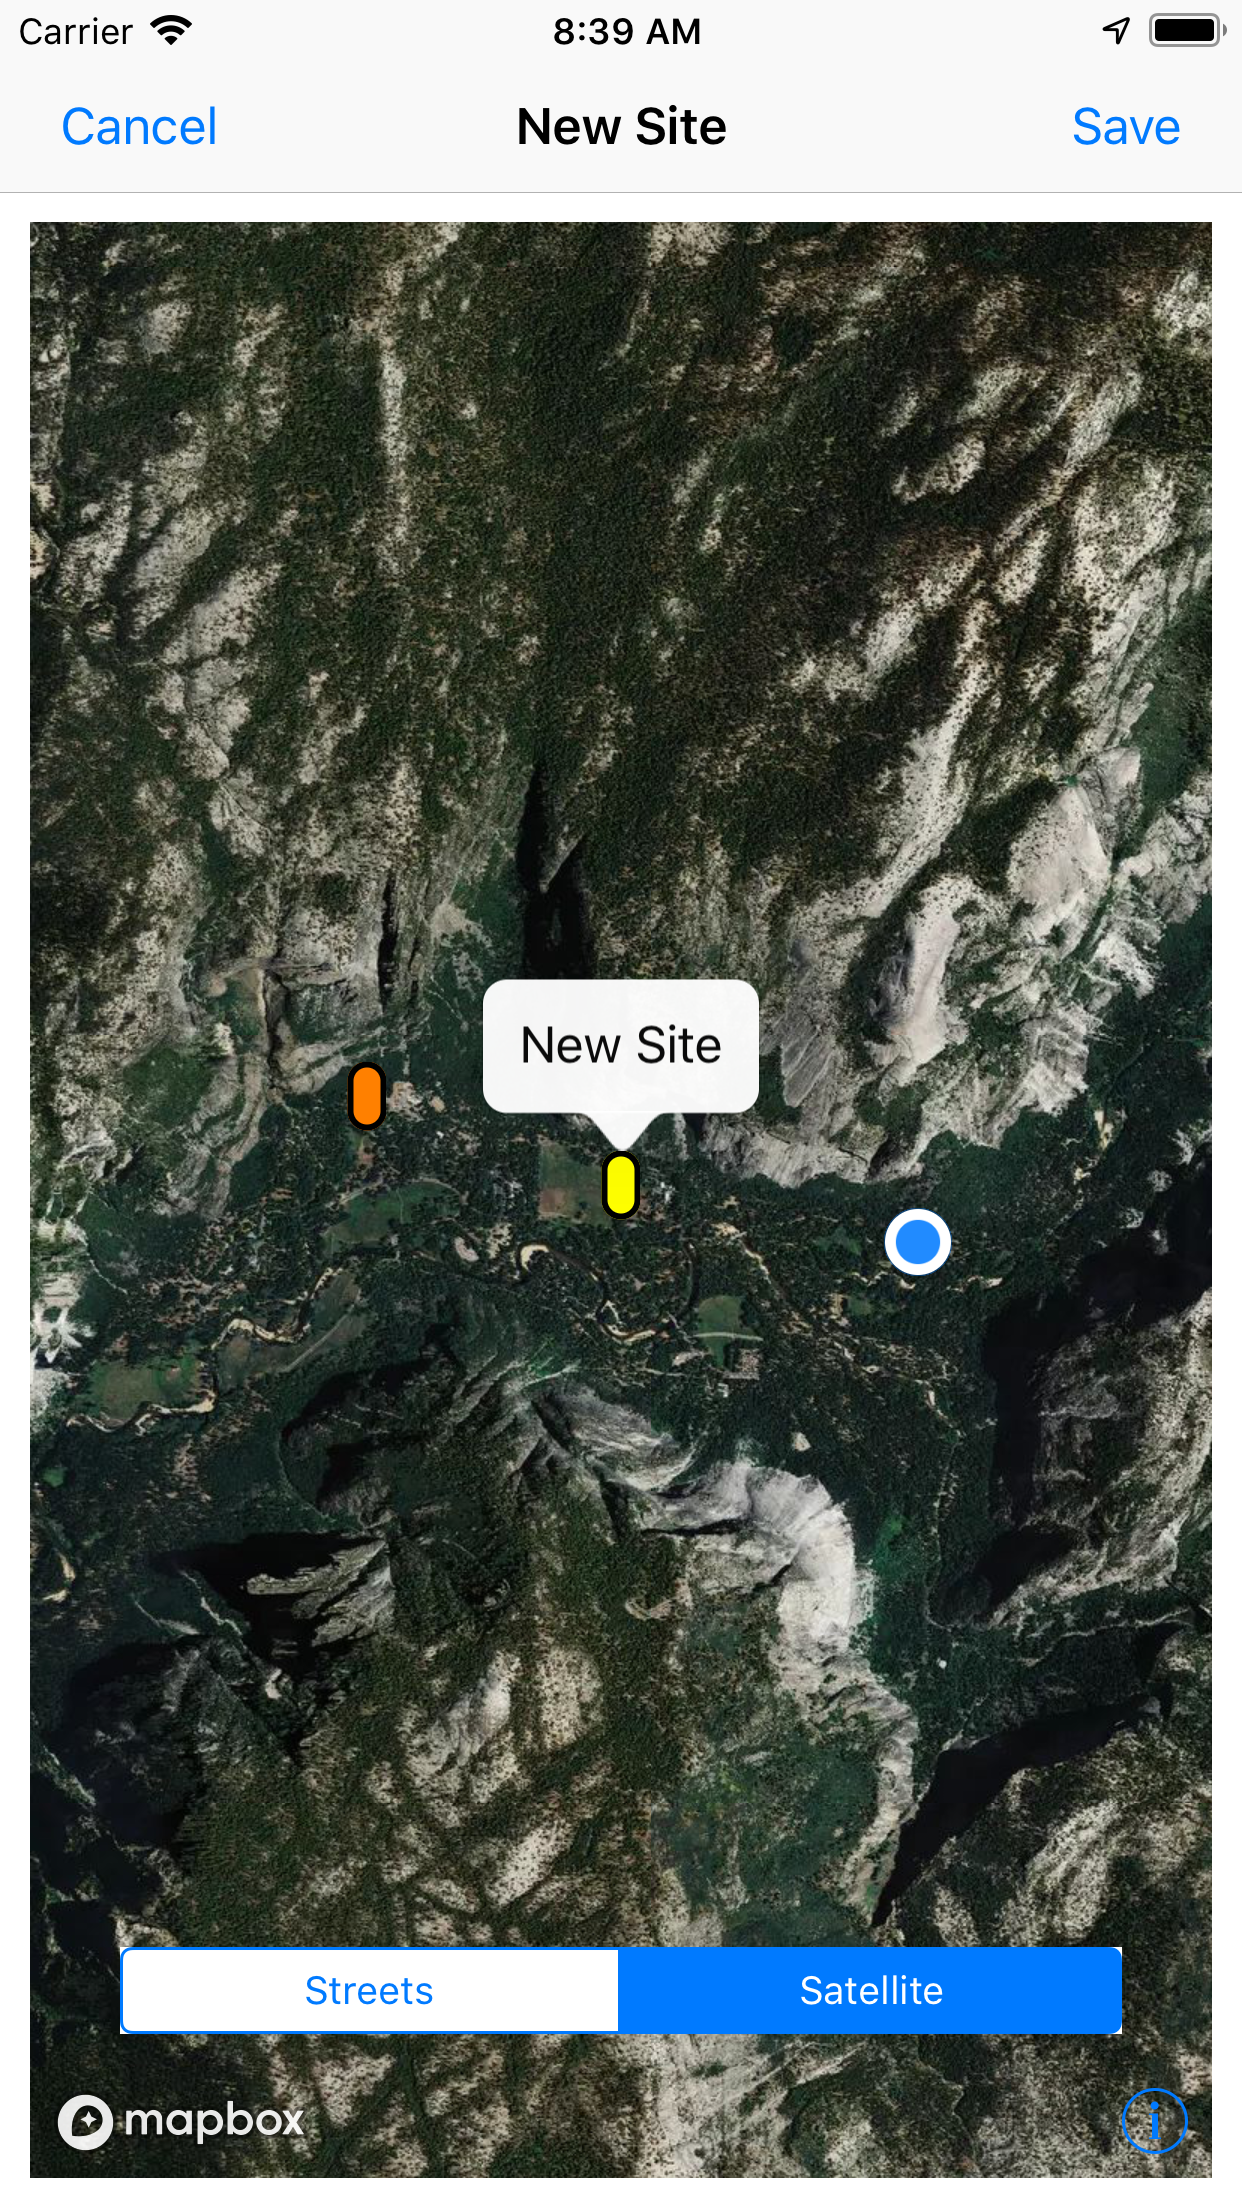
Set Location - New SiteIf you are collecting a sample at a new site you have two options for selecting the site. (1) In many cases you might be using the wiSamples App on-site as you collect. In this case, just tap the blue My Location symbol to use your current GPS location to establish a new site. Once selected, the Save button will be enabled and you can tap it to save the location and enter additional site information. (2) If you want to define a new site location other than your current position, or have no GPS fix, you can press-hold the screen to drop a marker on the map. Once the marker appears you can drag it to your desired location on the map and release to drop it. If you don't get it in the correct spot, just repeat the process; your old marker will disappear and a new one appear. Once you have the marker placed correctly tap it and then tap the Save button to record the location information. Tips |
|
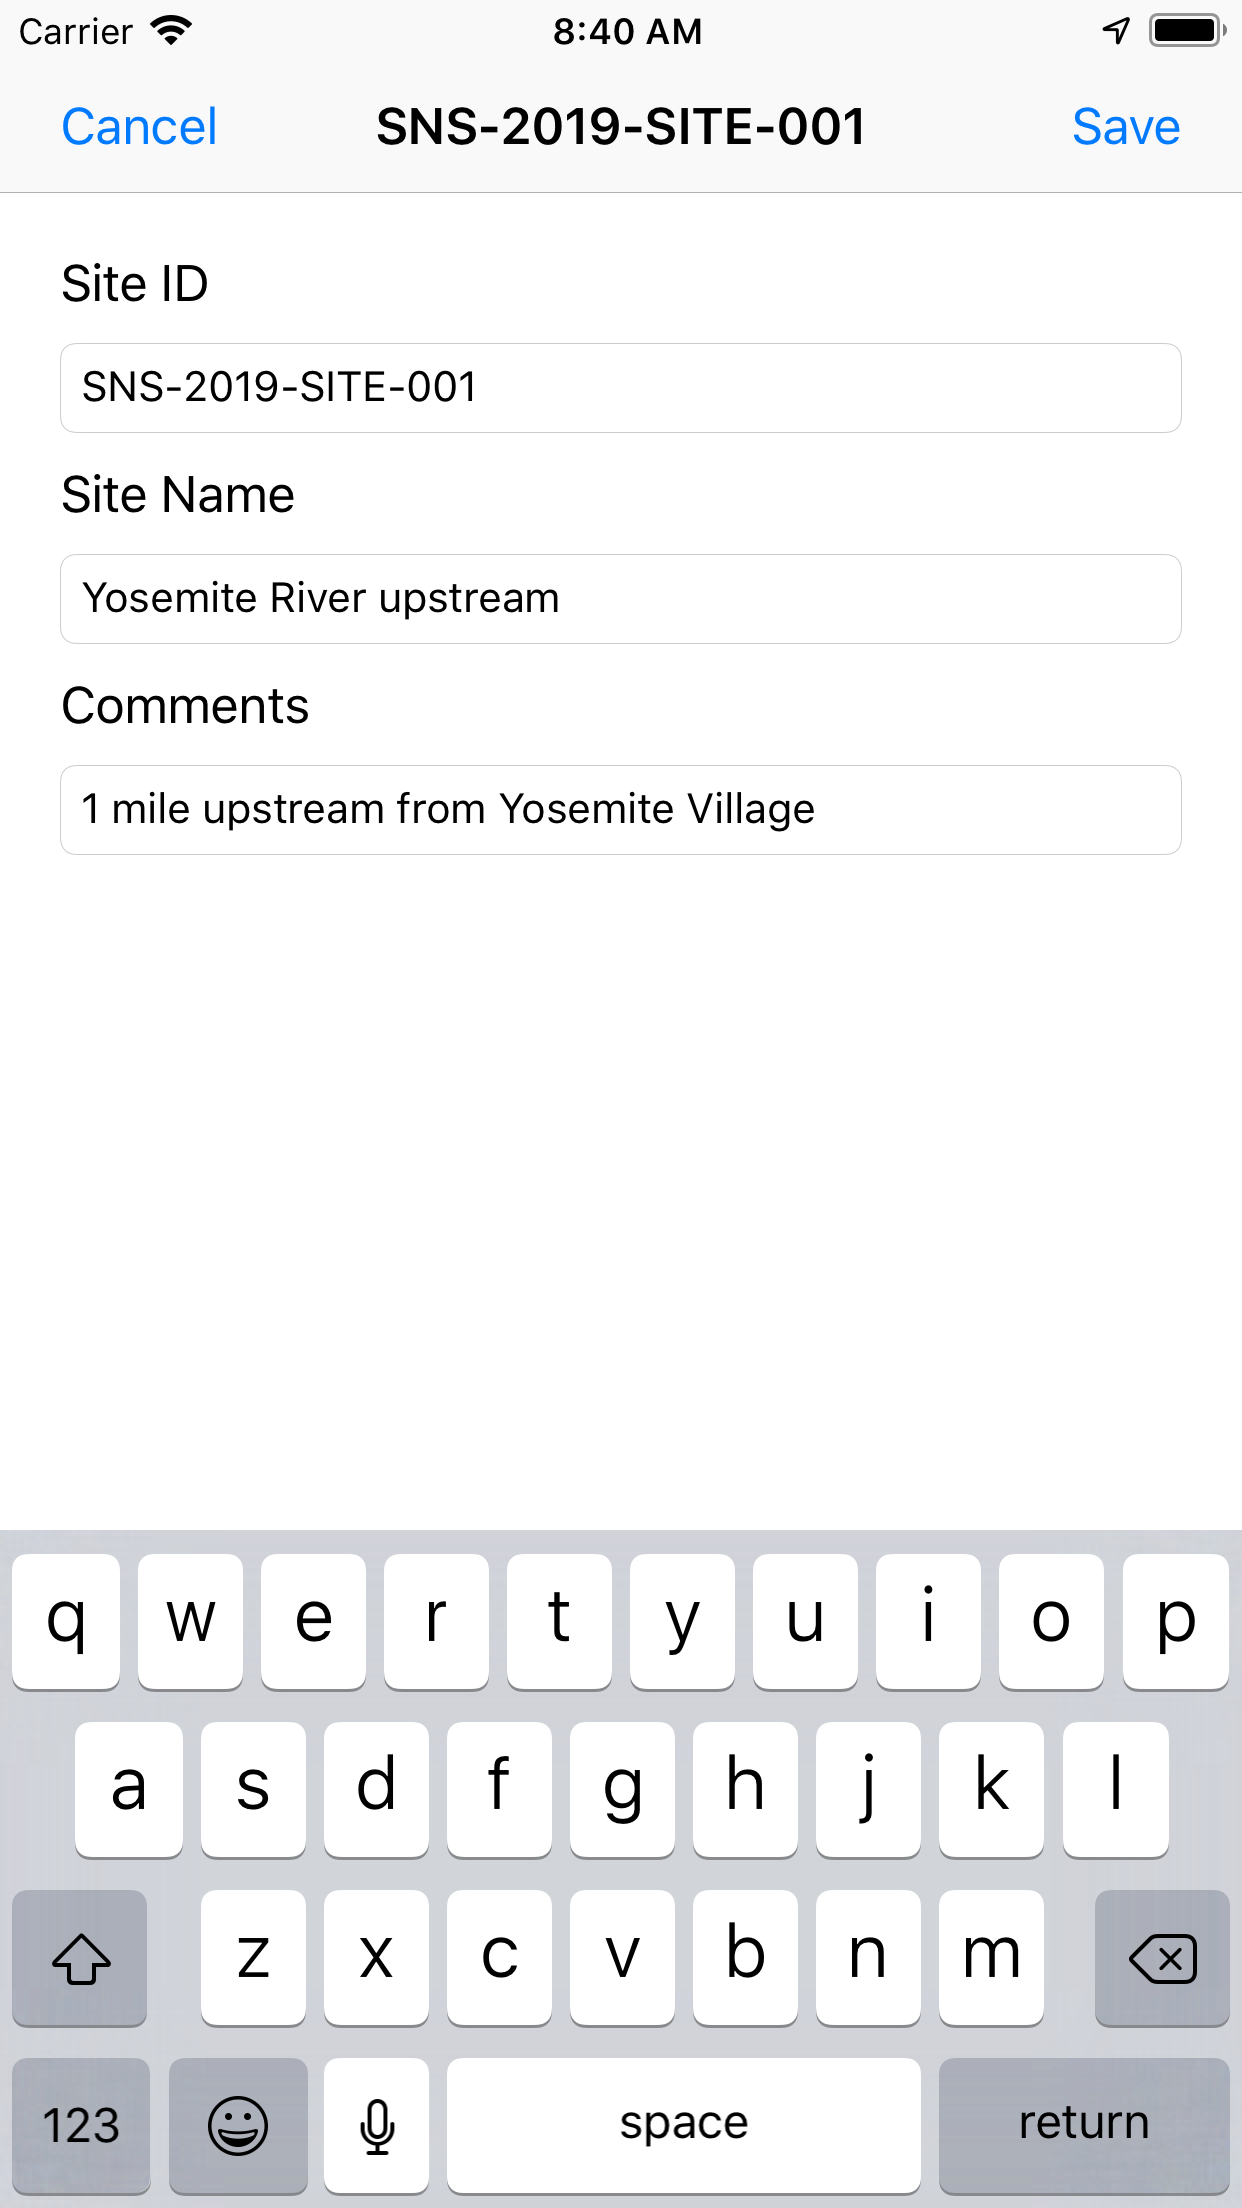
Site InformationAfter saving the location for a new site, you will be prompted to enter a few additional, optional, pieces of information. A Site ID is auto-generated using the same approach as for Sample ID, and can be edited if desired. Site Name is intended to allow entry of a common-language name that might be useful in later referring to or identifying the site. A field for freehand Comments about the sampling location is provided. Once you tap Save you will be returned to the Sample Information screen. Now that you've documented the sampling location, the Save button on that screen will be enabled. You can tap it to finish recording information for the sample, or tap More to complete optional metadata fields. Tips |
|
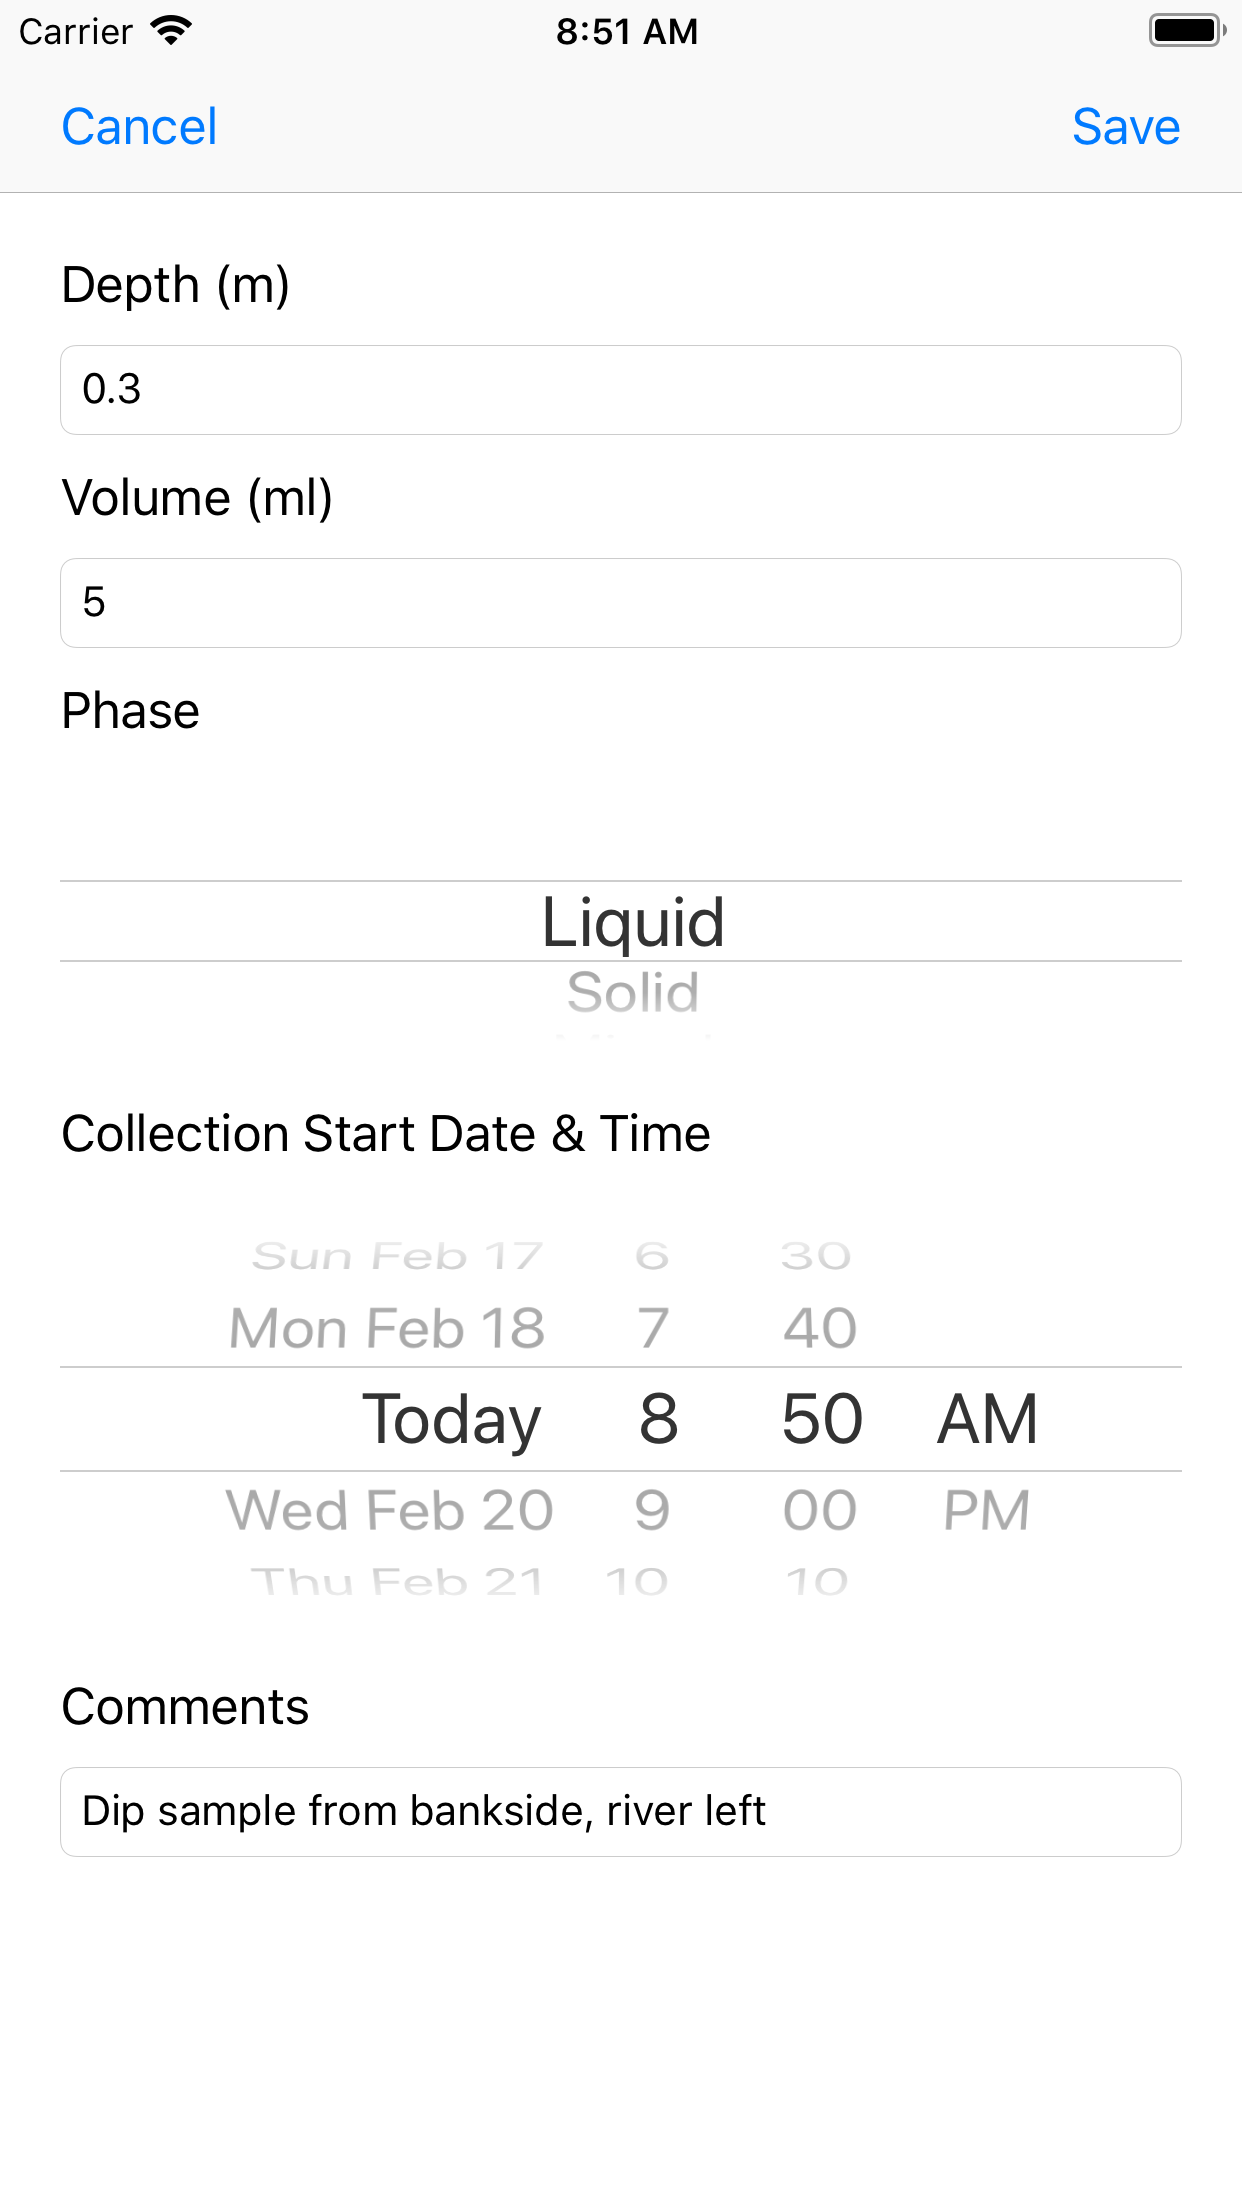
Optional Sample MetadataTapping the More button on the Sample Information screen takes you to this interface, where you can enter additional information that may be useful for certain sample types. Depth is intended to support vertical reference information, for example for lake, groundwater, soil or snowpack samples collected below the land or water surface. The convention used is positive values for depth below surface. The field can also be used to record above-ground heights (negative) where appropriate. Volume and Phase are intended primarily for precipitation samples, where they might be useful in documenting the type and amount of precipitation collected, but can be completed for other sample types if useful. Some sample types, in particular precipitation, are commonly collected over a span of time rather than as a discrete snapshot. Collection Start Date & Time lets you record the beginning of the collection period for such samples, and together with the required Collection Date & Time data element can be used to fully document the period of sample integration. Freehand Comments entered here should provide information about the sample or its collection. Tips |
|
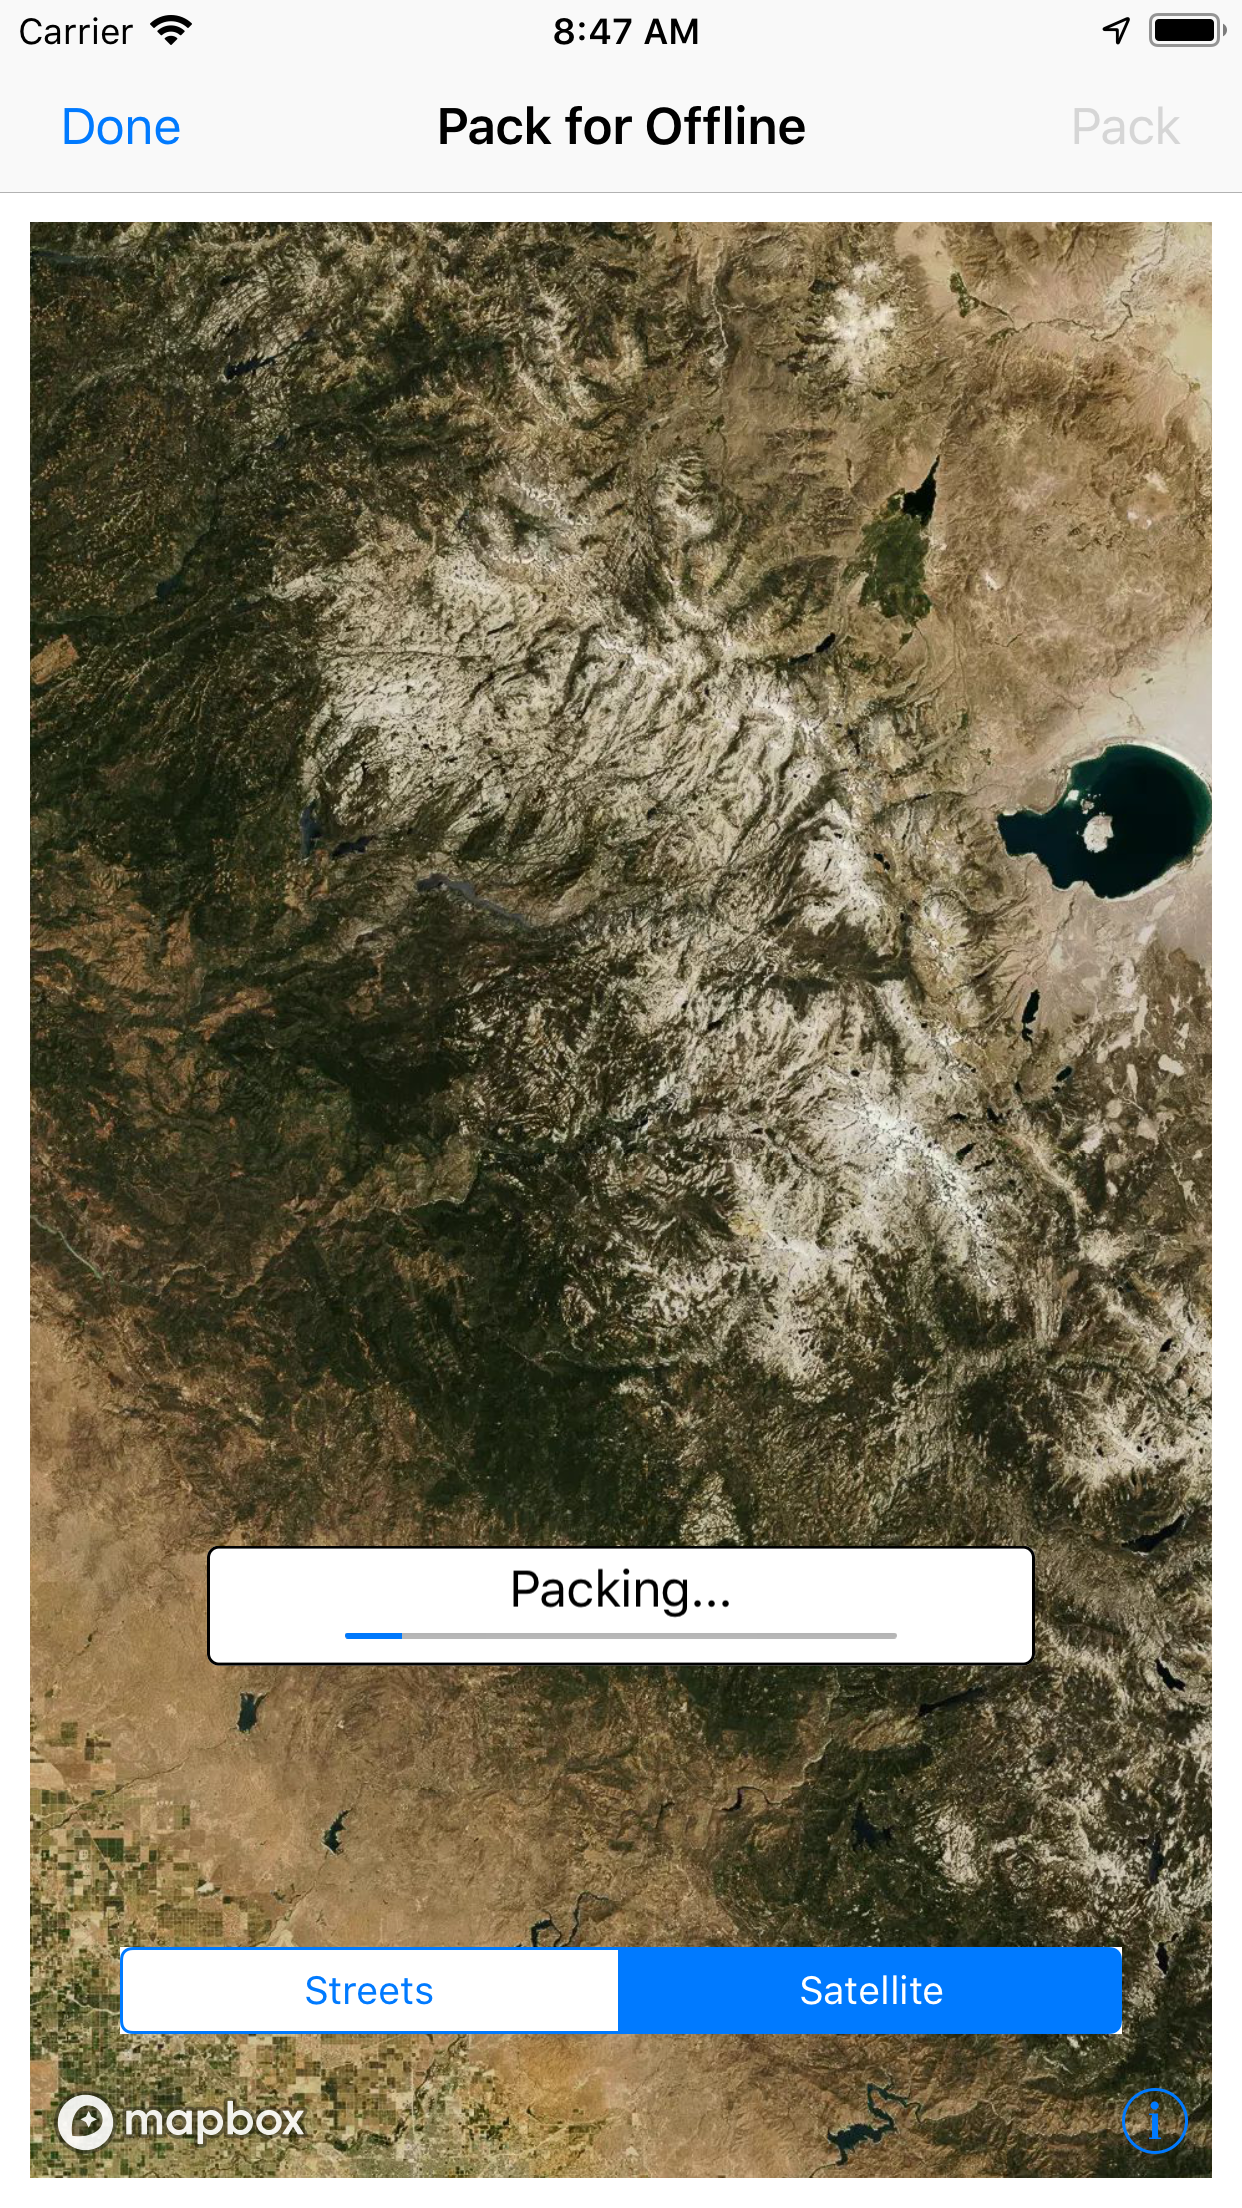
Pack for OfflineIf you are planning to use wiSamples without data connectivity, you will want to pre-load maps and sample locations for your study area before heading to the field. Although the app can use your device's GPS to record your sample locations even without this pre-load step the map interface will be blank except for the My Location symbol so you won't be able to cross-check your location against the map, associate your sample with wiDB sites, or effectively use the press-hold method to position new sites. Browse the map interface to position your entire field area within the screen view. Use the selector to choose whether the street map or satellite imagery is saved. Then tap the Pack button. The app will download map tiles and wiDB sites for the displayed area and store them on your phone. Tips |
|
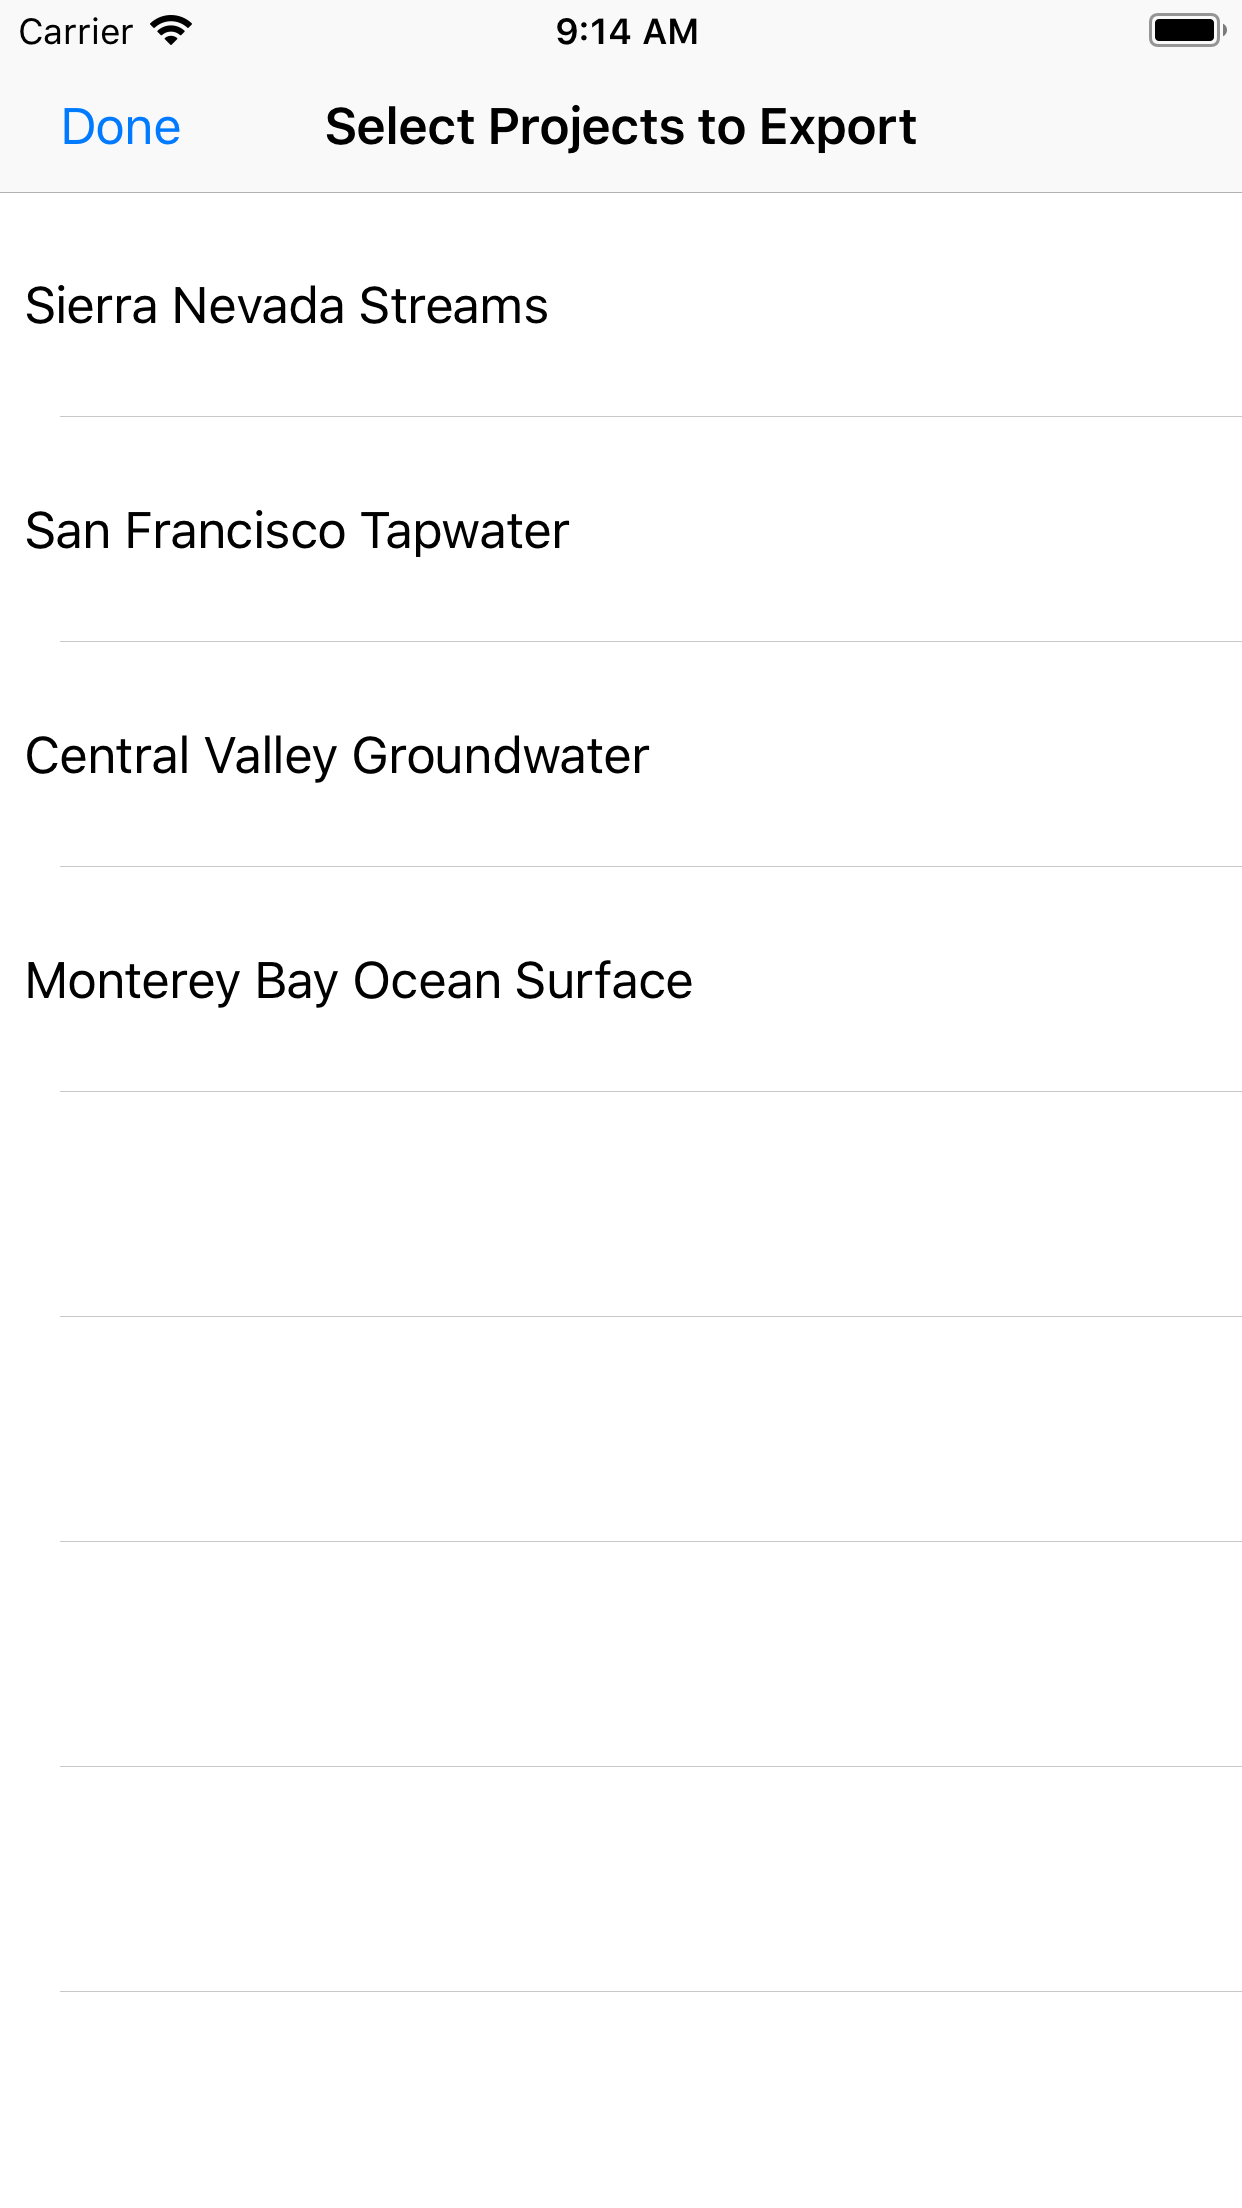
Export ProjectsNow that you've collected all those samples, you probably want to get your metadata off your device, right? The Export Projects screen makes that easy! Tap a Project Name from the list and the app will compose an email with your metadata as three CSV file attachments. These three tables should be pretty self-explanatory, and contain all of the information recorded for your Project and the Samples and Sites associated with that project. The Contact Email address associated with the project is auto-filled in the To field, but can be edited or appended as needed. Tips |
 |
No. Currently we only support an iOS version.
Absolutely. wiSamples has been tested on most current iPad versions and should work on yours. Keep in mind that iPads without cellular chips do not have internal GPS capabilities. These devices can provide coarse location information when connected to WiFi, but in many or most cases you will have to manually select and position sampling sites in the map interface. Also remember that you will need to pack map and site data while you have a data connection if you intend to use these devices in the field.
No one. All the information is stored locally on your device and you control who receives the data upon export. That said, wiSamples is designed so that the metadata you collect can be seamlessly imported into the wiDB, so if you are interested in sharing your results with the research community this is easy to do. You control if and when that happens.
Not currently. The current release of the app stores all data locally. To make sure you don't lose your metadata if your device is lost or damage, we recommend that you periodically export your projects so you have a back-up copy of this information.
Ideally you want your IDs to be unique, be as meaningful as possible, and be easy to write down on your sample bottles. Unfortunately, it's nearly impossible to achieve all three goals. The default ID scheme used here attempts to strike a balance, ensuring unique IDs within a project and allowing you to choose a prefix that embeds some information useful to you. We recommend choosing something that includes information that, for example, could help you easily identify which samples on the lab bench are associated with which project, but is short enough to make written records manageable.
We'd like to include barcode support in a future release, but it's not available yet. If you are an iOS developer and are interested in helping add new functionality please feel free to get in touch!
In order to achieve standardization that's necessary to make large databases such as the wiDB effective we have adopted an enforced vocabulary for some metadata fields, such as sample Type. We think the list provided covers most types of samples being measured today, and additional details can be recorded in the Sample Comments field. If you find the list woefully inadequate for your purposes, please feel free to contact us and make your case. We may be able to expand the list in future updates.
It is not possible to edit metadata for existing sites, since other samples, either from your own projects or those of others, may also be associated with these sites. When you associate your sample with an existing site, you are linking it to an established sampling location and site information. If you need to add customized metadata contextualizing a site for your own purposes, you should add a new site.
In general, unless you need to add custom metadata, it is best to associate your sample with an existing site if one exists at your sampling location. In addition to reducing redundancy, this makes it much easier for you or someone else to link your data with other measurements that may have been made at the same location.
The answer really involves a judgement call on your part, and we suggest you consider the following factors:
Unfortunately, we don't currently support links between wiSamples records and photos. We think this would be a cool addition, too. Watch for future updates. In the mean time you can always tag your photos with a Site ID!
Although it may not be the way you're used to working with your data, the structure used here incorporates best practices for data management by dividing data into tables that store distinct types of information. This reduces redundancy, providing an efficient model for storing and accessing the information and eliminating ambiguity that results if the same piece of information is recorded more than once. The information in the tables is linked by the Site_ID and Project_ID fields, and can be easily combined using simple database functions such as lookup in Excel and match in R.
Not at this time. If you want your sample metadata to be added to the wiDB you will need to email a copy of these files to us. We will do a quick quality check and then complete the upload.
There are two ways this can happen: